
Installing Vantage Ultimate 3.0
New Installations:
Download WebSpy Vantage Ultimate 3.0 and install on a machine (or virtual machine) that meets our recommended requirements for your network size:
Before you begin, create a dedicated User Account
All settings are stored under the currently logged in user’s profile. Using the software under a new user account will result in a clean (brand new) configuration. If more than one person needs to login and use the software with access to the same settings (storages, report templates etc.), create a dedicated ‘WebSpy’ user account, then provide the login credentials to all the people that need to use the software with the same configuration.
WebSpy Vantage 3.0 is designed for 64 bit Windows Server Operating Systems running Windows Server 2008 R2 or above. The WebSpy Vantage Installer will automatically install .NET Framework 4.6 if an earlier version (or no version) of the .NET Framework exists.
| Network Size | Recommended Server Specification |
|---|---|
| Less than 500 Users | 4 CPUs/Cores, 6 GB RAM |
| 500 – 1000 Users | 4 CPUs/Cores, 8 GB RAM |
| 1000 – 3000 Users | 8 CPUs/Cores, 12 GB RAM |
| 3000 – 5000 Users | 8 CPUs/Cores, 16 GB RAM |
| 5000+ Users | 16 CPUs/Cores, 24 GB RAM |
* Virtual environments are recommended so you can scale the resources as required.
The amount of data stored per day will vary depending on the amount of log file data imported into your WebSpy Vantage storages. Generally speaking, your WebSpy Vantage Storages will be about 80% the size of imported log files (uncompressed log file size).
You can also apply NTFS compression and data deduplication to your WebSpy Vantage Storage folder (Tools | Options | Paths | Storages) to reduce the size of your Storages on disk.
You can automate your own data retention policy using the Purge Data from Storage task action which will automatically remove data older than a certain date.
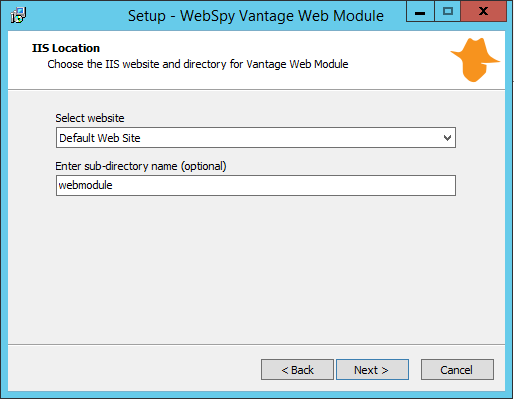
Selecting the website and optional sub-directory for the Web Module
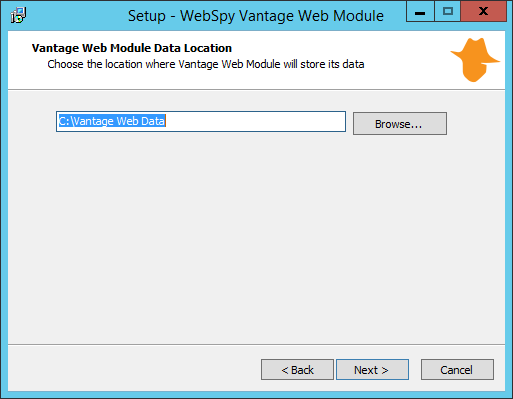
Selecting the Web Module’s data location.
Installing The Vantage Web Module
The Vantage Web Module is a separate web application that enables other people to login and securely view the reports they have permission to view. For example, give permission to department managers to login and view only their reports.
Note: WebSpy Vantage can be used without the Web Module if this feature is not required. WebSpy Vantage can produce reports as HTML, PDF, Word, CSV or Text by itself.
Installing the Vantage Web Module installs and configures Microsoft IIS, turning your server into a Web Server. You can install the Web Module on the same machine that you installed WebSpy Vantage (above), or a different machine. For example, you can have multiple instances of WebSpy Vantage in different locations all publishing reports to a central Web Module.
64 bit Windows Server Operating Systems running Windows Server 2008 R2 or above. The Vantage Web Module Installer will automatically install and configure IIS with ASP.NET 4.6 if it is not already installed.
| Number of Web Module Users | Recommended Server Specification |
|---|---|
| Less than 50 Users | 2 CPUs/Cores, 4 GB RAM |
| 50 – 1000 Users | 4 CPUs/Cores, 8 GB RAM |
| 1000 + Users | 8 CPUs/Cores, 12 GB RAM |
* Virtual environments are recommended so you can scale the resources as required.
You can publish both Reports and Storages to the WebSpy Vantage Web Module. Storages enable users to drilldown into data past the bounds of a published report. Data Storage requirements vary based mainly on the number and size of storages published to the Web Module.
If you have WebSpy Vantage and the Web Module installed on the same machine, it’s important to note that Storages within WebSpy Vantage and Storages published to the Web Module are separate, and both count towards total disk space requirements. For example, if you have a 1 GB storage in WebSpy Vantage, and you use it to publish five 200 MB storages to the Web Module for each of your five departments, then the total disk usage is 2 GB.
You can automate your own data retention policy using the Purge Data from Web Module task action which will automatically remove data older than a certain date from the Web Module.
How to Install
- Click the second option to launch the Vantage Web Module installer
- IIS Location
The first page of the installer asks what website and sub-directory to install the Vantage Web Module into.- If this is a new server, or you know there are no other websites or web services running on the machine (such as Outlook OWA), then it is safe to select “Default Web Site” and leave the sub-directory option blank. The Web Module will then be available via http://servername (replace servername with your actual server’s name or IP)
- If there are other websites running on the machine, then use the ‘sub-directory’ option to ensure the Vantage Web Module does not conflict with any other websites. The Web Module will then be available via http://servername/subdirectoryname (e.g. http://myserver/webmodule)
- Data Location
The second page of the installer asks where you would like the Web Module to store data. The default is C:\Vantage Web Module. We recommend specifying a location with plenty of disk space to accommodate the storages and reports you’ll be publishing. Do not use a network path or mapped network drive. Local drives only.
The Web Module’s Initial Configuration Wizard
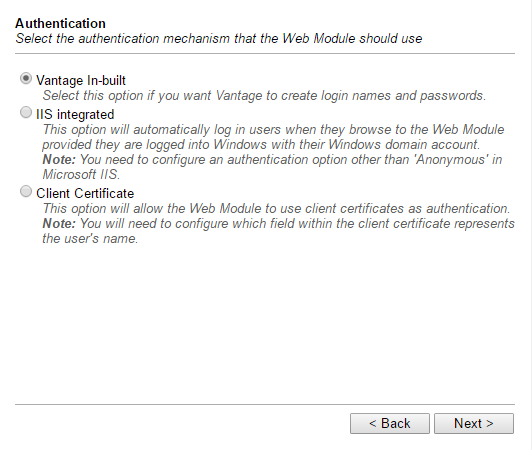
Selecting the Web Module’s Authentication Type
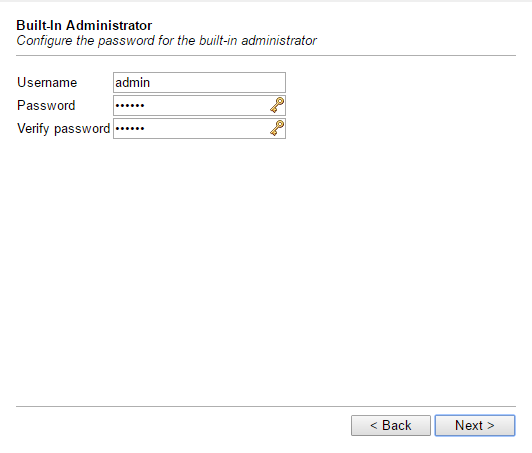
Creating the admin username/password
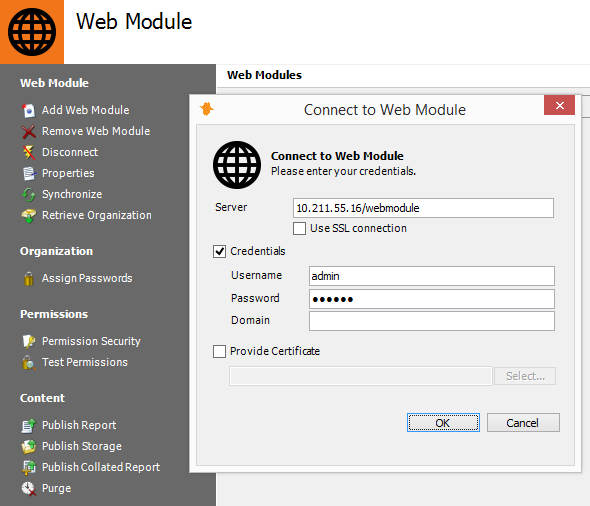
Connecting Vantage with the Web Module
Connect Vantage to the Web Module
Browse to the Web Module’s URL and you’ll be presented with the Initial Configuration Wizard.
- On the Authentication Page, select Vantage In-built (this can always be changed later in Options | Authentication)
- On the Built-in Administrator page, enter a username and password for the Administrator account.
- Click Next, and login to the Web Module using your newly created Administrator account.
Now that the Web Module is installed and configured, you need to inform WebSpy Vantage how to connect to the Web Module to publish reports and storages.
- Open WebSpy Vantage Ultimate, go to the Web Module tab and click Add Web Module
- Enter the URL for the web module (without http:// or https:// at the beginning), your administrator username and password and click Connect.
Tip: See our guide on configuring the Web Module to use Windows Authentication so that users can log straight into the Web Module without an authentication prompt.
Now that Vantage has an active connection to the Web Module, you can publish reports and storages to it using the Publish Report to Web Module wizard. But you will first need to import some log data into a storage, create a report template (or use one of the default templates), and import your Organization from LDAP so that other people in your organization can view reports in the Web Module.
For information on how to do this, please see the Getting Started Guide below.
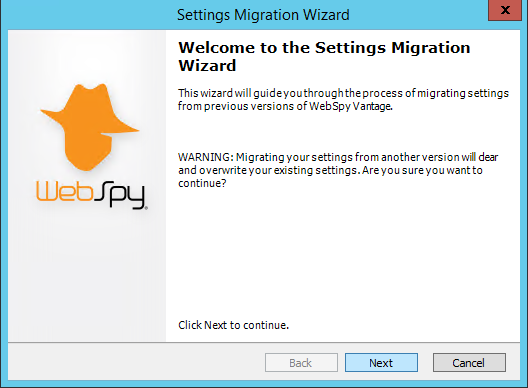
Migration Wizard available via Tools | Migrate Settings
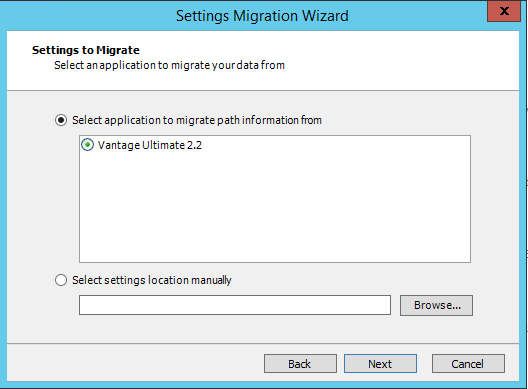
Select the previous Vantage application.
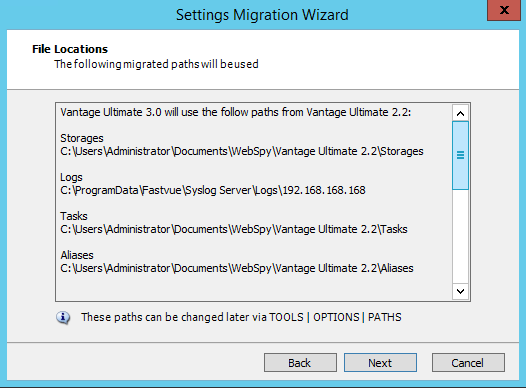
Vantage 3.0 will be configured to use these file locations.
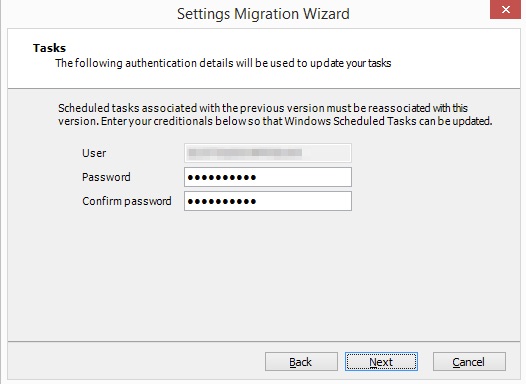
Enter authentication credentials to re-configure Scheduled Tasks to use Vantage 3.0.
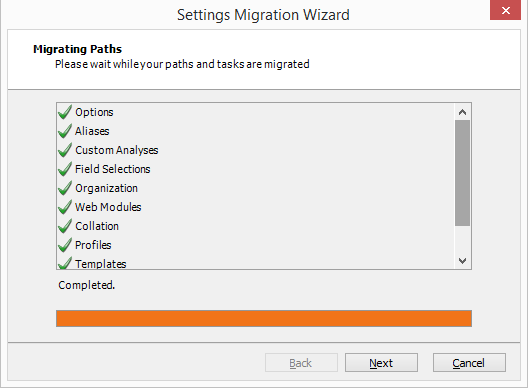
Migration Status
Upgrading Vantage 2.2 to 3.0
If you have version 2.2 of WebSpy Vantage and/or the Web Module installed, it is easy to migrate your settings to the new version 3.0 by following the step below.
Note: Migrating settings will overwrite any existing settings in Vantage Ultimate 3.0. If you have not yet used Vantage Ultimate 3.0, then this is not a problem.
- Install Vantage Ultimate 3.0
Download and install Vantage Ultimate 3.0 (not the Web Module – see below for Web Module instructions). This will install the required version of the .Net framework if not already installed. Do not uninstall your earlier version of Vantage Ultimate at this stage. - Migrate Settings
When you first launch Vantage Ultimate 3.0, the application will detect your earlier version and you will be prompted to migrate your settings. Click Yes. If it is not the first time you have launched Vantage Ultimate 3.0, you can access the Migration Wizard by selecting Tools | Migrate Settings. - On the Settings to Migrate page, select the version of WebSpy Vantage that you were previously using and click Next.
- The File Locations page shows all the settings paths used by your previous version of WebSpy Vantage. The Migration Wizard will configure Vantage Ultimate 3.0 to use these same paths. Review the paths and click Next (you can change these paths later in Tools | Options | Paths).
- The Tasks page asks you to enter the credentials of the account you are currently logged into Windows with. This is so that the Windows Scheduled Tasks currently configured to launch your earlier version of WebSpy Vantage can be changed to use WebSpy Vantage 3.0. Enter your account’s password and click Next to start the migration process.
- Your settings will now be migrated and a progress indicator is shown. Once complete, click Next and OK to complete the Settings Migration Wizard.
Once the migration is complete, click each tab in WebSpy Vantage Ultimate to check all the settings from your earlier version have been successfully migrated. When you are satisfied that everything is working in Vantage 3.0, you can uninstall Vantage 2.2. This will not remove any of your existing data or paths.
Loading New Templates and Aliases released in Version 3.0
When migrating your settings from version 2.2, the default templates and aliases in Version 3.0 are overwritten with your custom settings. This means you will not see any of the new Report Templates or Aliases we released in Version 3.0 after using the Migration Wizard. However, you can load these Templates and Aliases manually after migrating your settings.
To open the new Templates:
- First, backup your existing templates, by going to Reports and clicking Save Templates. Give your Templates file a name and click Save.
- Download the new Vantage 3.0 Templates, extract the zip, then go to Reports | Open Templates and select the Vantage Ultimate.Templates file.
- Select ‘Keep existing template AND add new template (name of new template will be modified)‘ and click Merge.
The new Report Templates available in Vantage 3.0 will now be available, alongside all your existing report templates.
To open the new Aliases:
- First, backup your existing aliases by going to the Aliases tab and clicking Save Aliases. Give your Aliases file a name and click Save.
- Download the new Vantage 3.0 Aliases, and extract the zip. This reveals six alias files:
- Productivity
- User Agents
- Port Names
- Operating Systems
- IP Protocols
- Files
- On the Aliases tab, find the Productivity alias in the list. Right-click the Alias and select Delete.
- Click Open Aliases and select the Productivity.Alias file and click Open. Your old Productivity alias has now been updated with the new settings.
- Repeat steps 3 and 4 for each Alias above, selecting the corresponding Alias file to open each time.
Please note, most of the new report templates in Vantage 3.0 make use of the new settings in the Productivity alias, so we definately recommend updating both.
Upgrading the Web Module from 2.2 to 3.0
The Vantage Web Module v3.0 cannot be installed along side an earlier version of the Vantage Web Module. You first need to uninstall your earlier version via Programs and Features, but this does not mean you will lose any data. The uninstall does not remove any of your Web Module’s reports, storages or configuration data. The new installation of Vantage Web Module 3.0 will use the same settings from your earlier version.
- First log into your existing Web Module and make note of the URL in the address bar. If the URL simply contains a server name or IP address before the ‘Welcome.aspx’, such as http://192.168.168.7/Welcome.aspx or http://myserver/Welcome.aspx then you will not specify a sub-directory when installing v3.0 below. If the URL contains another path before the Welcome.aspx, such as http://192.168.168.7/webmodule/Welcome.aspx or http://myserver/webmodule/Welcome.aspx, then you will specify a sub-directory of the same name (‘webmodule’ in this example) when installing v3.0 below.
- Also make note of the Vantage Web Module’s data location. By default, this is C:\Vantage Web Data. If you’re not sure where the Web Module is saving data, search your server for a file called Vantage Web Module.Settings. This file is contained within the Web Module’s data folder.
- Once you know the Web Module’s data location, as well as whether or not the earlier version was using a sub-directory, go to Programs and Features and uninstall your existing version of the Vantage Web Module.
- Once uninstalled, double-click the downloaded Vantage Ultimate 3.0 executable and click the second option install Vantage Web Module v3.0.
- On the IIS location page, select your website and if you identified a sub-directory in step 1 above, enter the name of it here. Click Next.
- On the Data Location page, enter the Web Module’s data folder that you identified in step 2 above. Click Next and OK to install.
Once installed, you should be able to browse to the Web Module, login as before, and open and view your previous reports. You should also be able to connect to the Web Module from Vantage (on the Web Module tab).
Once installed, you should be able to browse to the Web Module, login as before, and open and view your previous reports. You should also be able to connect to the Web Module from Vantage (on the Web Module tab).
Upgrading Vantage 3.0 to the latest 3.0 build
If you are already running WebSpy Vantage 3.0, there are two ways to ensure you’re running the latest build.
In WebSpy Vantage, go Tools | Check for updates to update to the latest version. You may need to configure your proxy settings in Tools | Options | Proxy if WebSpy Vantage cannot contact the update server.
To update the Web Module, right-click the WebSpy icon in the system tray (next to the clock) and select Check for updates. To configure the proxy settings that the Web Module updater uses, right-click the system tray icon again and select Options | Proxy.
You can also update by downloading the latest installer. Simply run the new installer for both Vantage Ultimate and the Web Module over the top of your existing installations. The installers will pick up your existing settings, so just click next throughout the wizard without making any changes.
Getting Started
Access your log files
WebSpy Vantage has native support for over 200 different log file formats. Network devices usually provide some way of accessing their log files and/or transferring them automatically off-box. The most common method is syslog.
To import syslog data, you first need to log the syslog messages to text files, and then import those text files into WebSpy Vantage. If you already have a syslog server that logs syslog data to text files, then you can import those logs, or you can try our own Fastvue Syslog – a free and unlimited syslog server for Windows.
In addition to text logs, WebSpy Vantage can also import Windows Event Logs directly from machines on your network. WebSpy Vantage can also import data directly from the MS SQL log databases created by Microsoft Forefront TMG, Microsoft IIS, Microsoft ISA, Trend Micro IWSS and Bloxx Web Filter.
Once you have access to your log files, you can import them into a WebSpy Vantage Storage.
Getting Started Guides
See our other supported log formats.
Supported Formats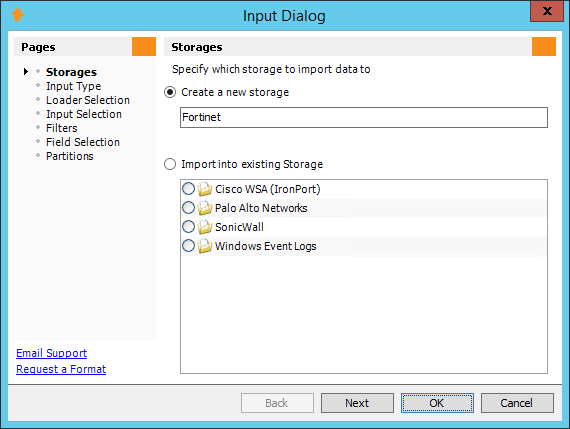
Creating a new Storage.
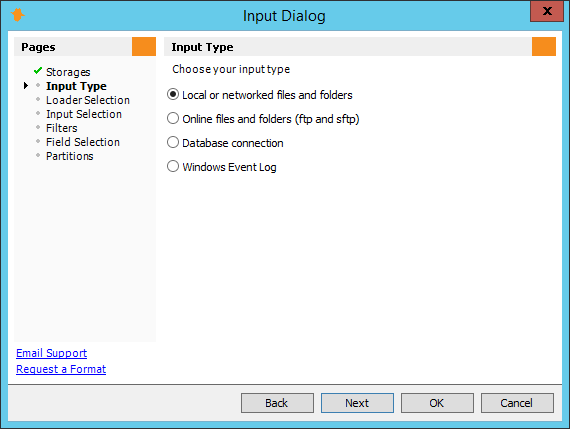
Selecting the input type (local or networked files and folders)
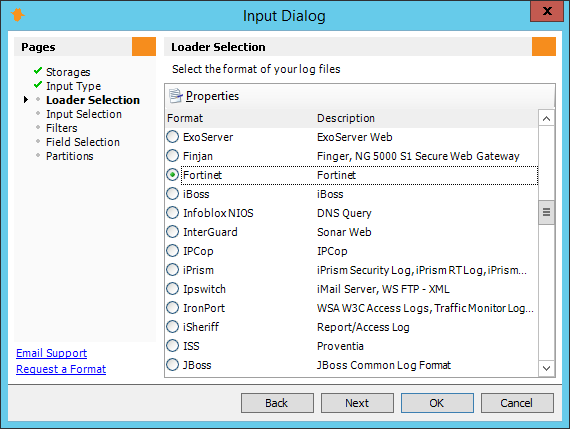
Selecting the log format (loader)
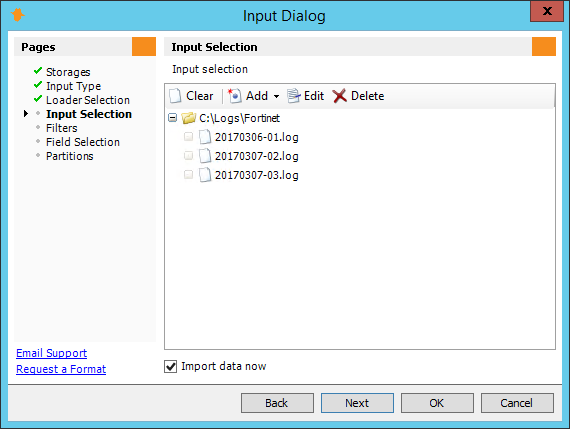
Adding a folder of log files.
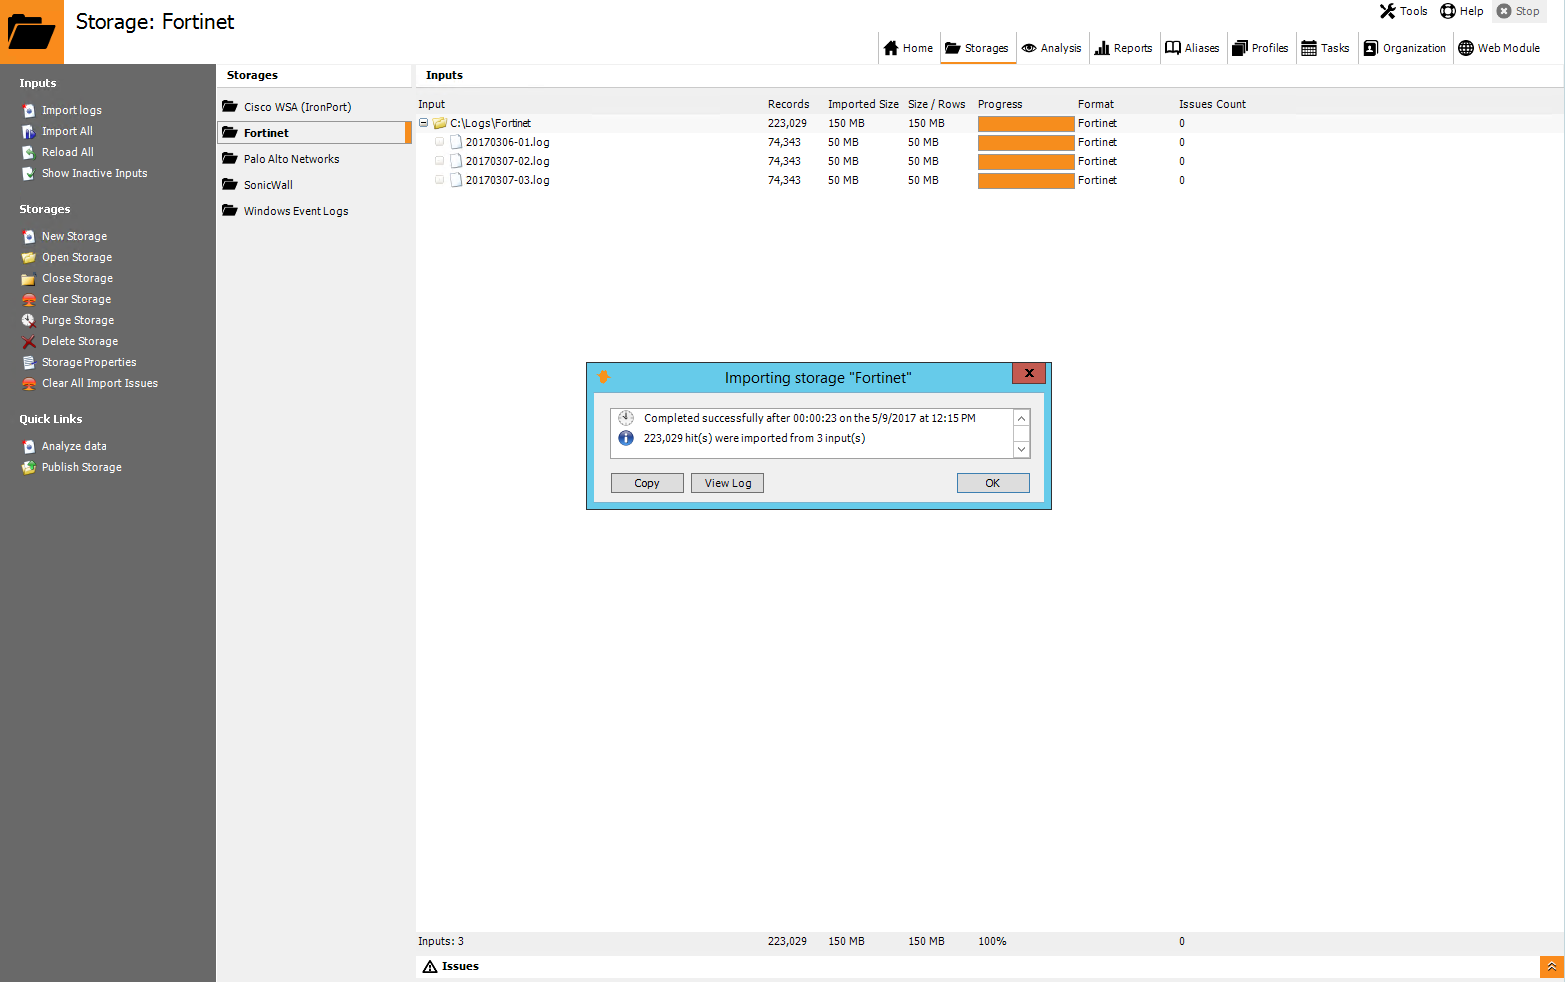
A successful log file import.
Importing Log files into WebSpy Vantage
Once you have access to your log data, you can import your logs into WebSpy Vantage and begin analyzing and reporting on the log data.
Before you begin, be aware that your WebSpy Vantage storage will consume disk space as it holds roughly 80% or the original log file data. Check that your storages are being created in a location with enough disk space to allow for this. You can change the location in Tools | Options | Paths | Storages.
To import your Log files into WebSpy Vantage:
- Open WebSpy Vantage and go to the Storages tab
- Click Import Logs to open the Import Wizard
- On the Storage page, create a new storage and call it anything meaningful to you. For example, name it after the log format or the device that you are importing logs from. Click Next.
- On the Input Type page, select how you would like to import data, such as from Local or Networked Files or Folders, FTP/SFT, Database or Windows Event Logs and click Next.
- On the Loader Selection page, select the Format of your log files. We call the formats listed here ‘loaders’. It is important to select the correct loader as it contains the logic to parse and understand your log format. Click Next.
- On the Input Selection page, Click Add. The options here vary depending on the Input Type selected in step 4. For example, if you selected Local or networked Files or Folders, then you’ll have the option to select a folder or file to import. If you selected Windows Event Logs, you’ll have the option to select the machines to import from etc. Once you have selected where your log files are located, click OK.
- At this stage, you can ignore the last three pages of the Import Wizard and click OK to begin the import process.
Your log files will start importing into your WebSpy Vantage Storage, and you can use this storage for Analysis and Reporting from this point on. You can even delete the original log file data once it has been imported.
Now that you have created a storage that is pointing at your log data, it is a good idea to automate the process of importing new logs each night. To do this:
- In WebSpy Vantage, go to the Tasks tab and click New Task.
- Call the Task Daily Task and proceed through the short wizard to create a task with a Daily schedule running at 1am in the morning.
- Once the Task has been added, select the next task and click Add Action | Import new hits to existing storage
- Select the Storage you created above. Select Resume Import from last position if your log files are appended to with new data and/or new log files are created in the folder your storage is pointing to (most common). If the same file log files (same names) are overwritten each day with new data, then select the Return to start of log file or table.
WebSpy Vantage will now automatically import new log files each night at 1am. As this storage will grow until you run out of disk space, it is a good idea to add a data retention policy using the Purge data from storage task action. To do this:
- Still on the Tasks tab, select the Task you created above and click Add Action | Purge Data from Storage.
- Select your Storage and click Next
- Select your desired data retention, such as Purge data older than 3 months.
WebSpy Vantage will now automatically purge data from your storage once it has imported new logs files.
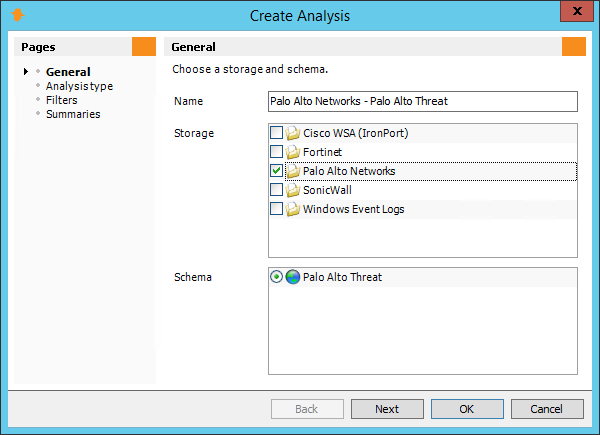
Selecting the Storage and Schema for analysis.
Selecting ad-hoc analysis.
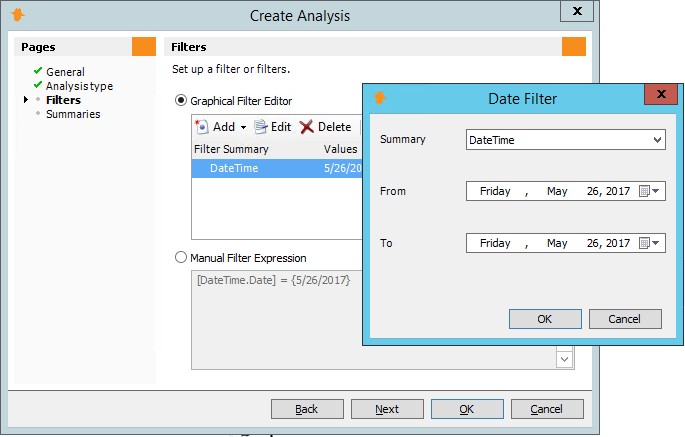
Adding a date filter.
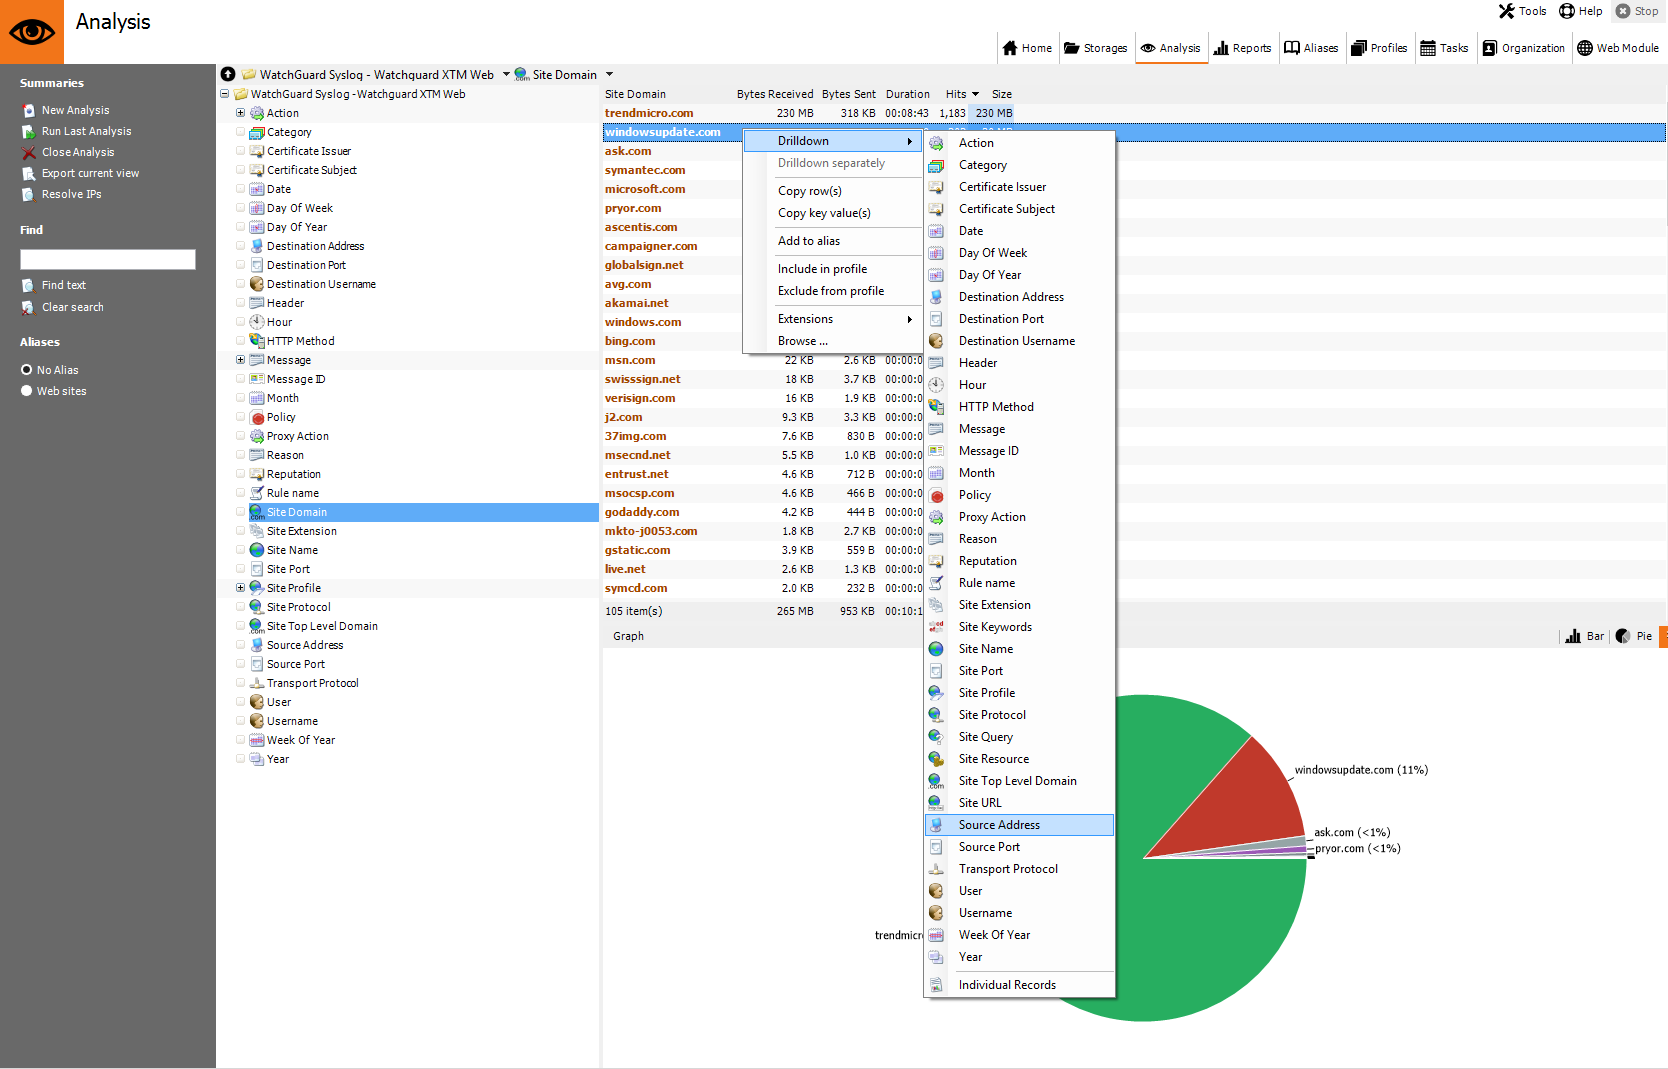
Drilling down into data using the right-click menu.
Analyze Your Storage
Now that you have imported data into a WebSpy Vantage storage, you can use that storage for analysis and reporting. In fact, you can move or delete your original log files, and you will still be able to analyze and report on them using the WebSpy Vantage Storage.
To get started exploring your data, run an ad-hoc analysis:
- Go to the Analysis tab in WebSpy Vantage
- Click New Analysis
- On the General page, select your Storage and the Schema within the storage that you would like to analyze. Click Next.
About Schemas: A schema is the list of Summaries that Vantage Ultimate can build given the fields available in any log file. Schemas are also used to separate logically different sets of information from a log file, such as web or email information.
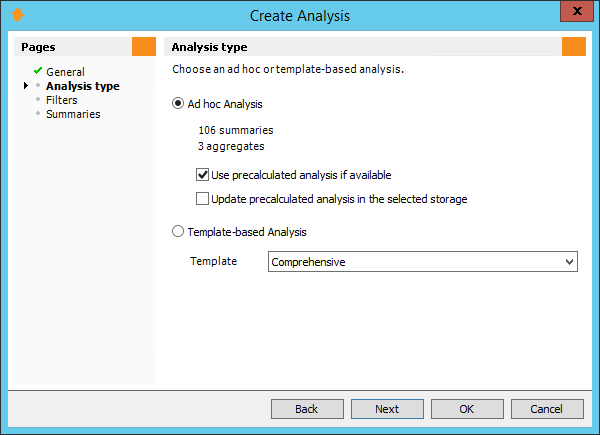
- On the Analysis Type page, select Ad-hoc Analysis and click Next
- If you imported a large amount of data into your storage, on the Filters page, select Add | Date Filter and select a small date range to analyze. Click Next.
- Leave the default options on the Summaries page and click OK.
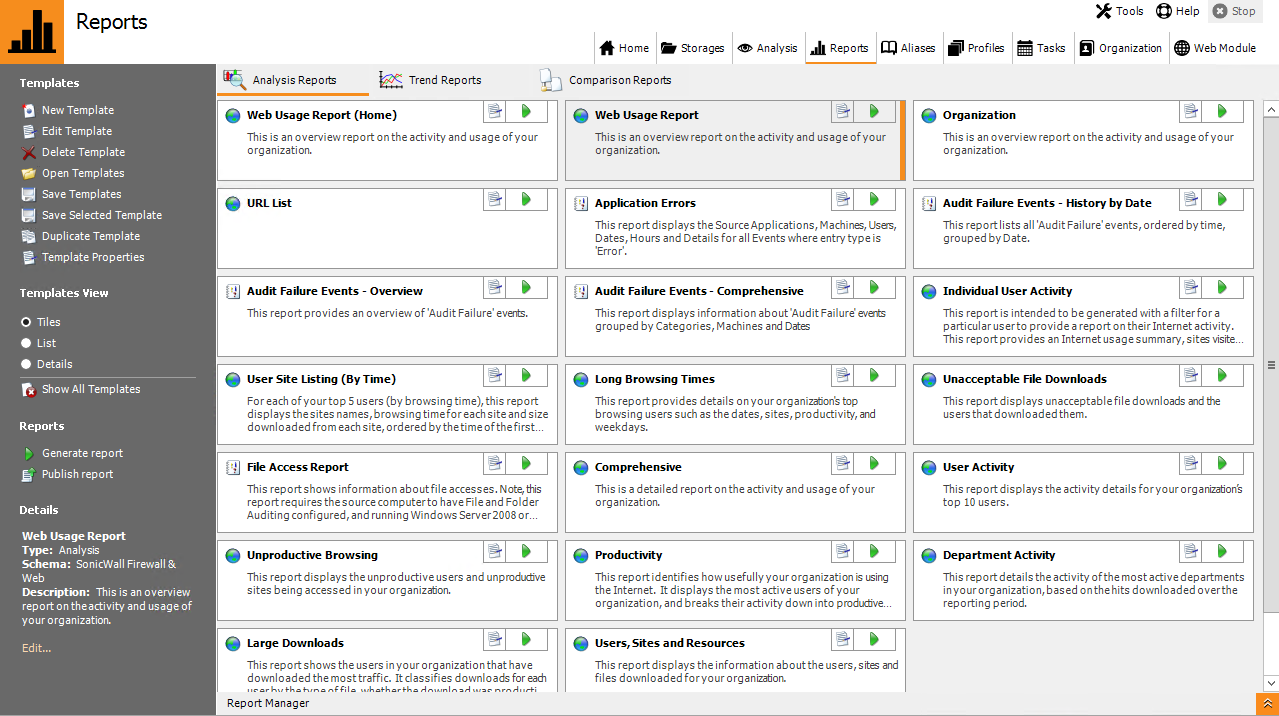
Selecting a Report Template
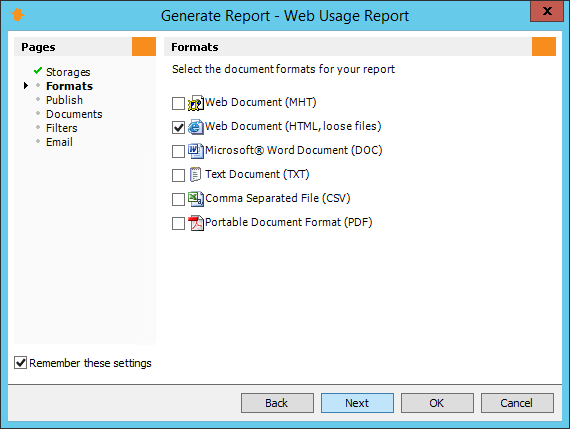
Selecting the Report Format when generating a Report document.
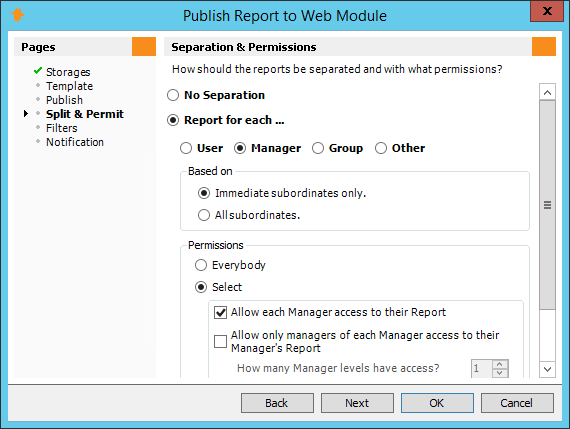
Publishing Reports to the Web Module with permissions.
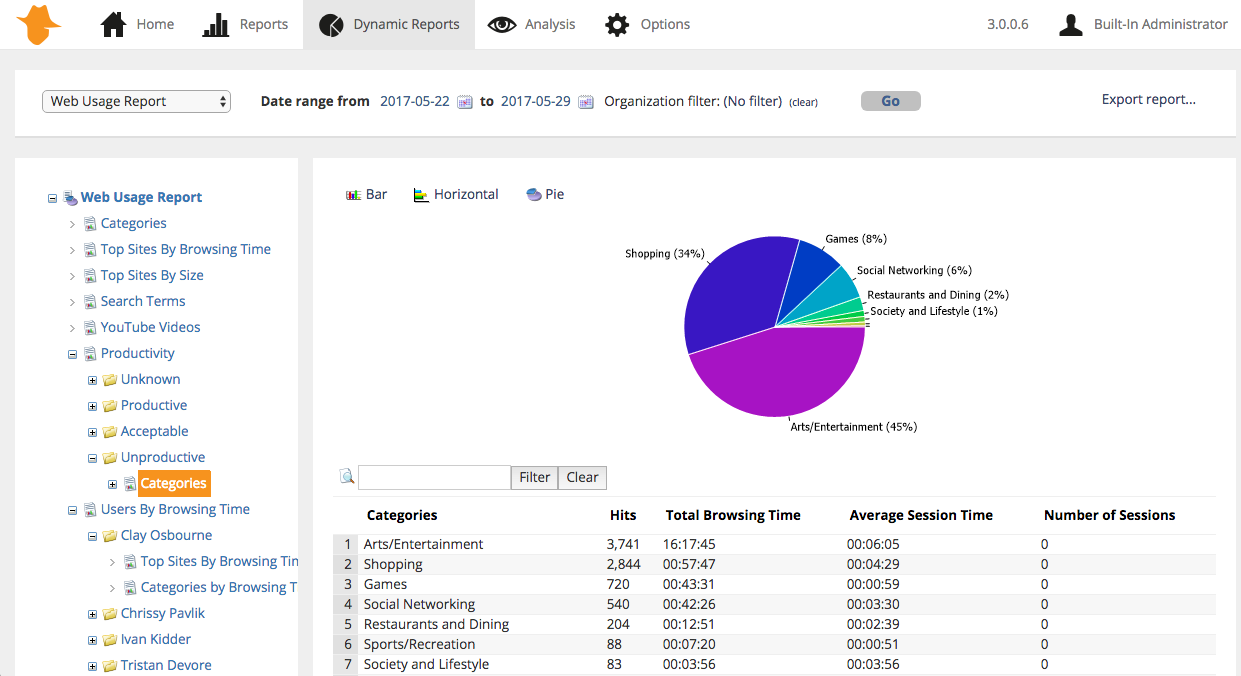
Reports viewed on the Dynamic Reports tab in the Web Module
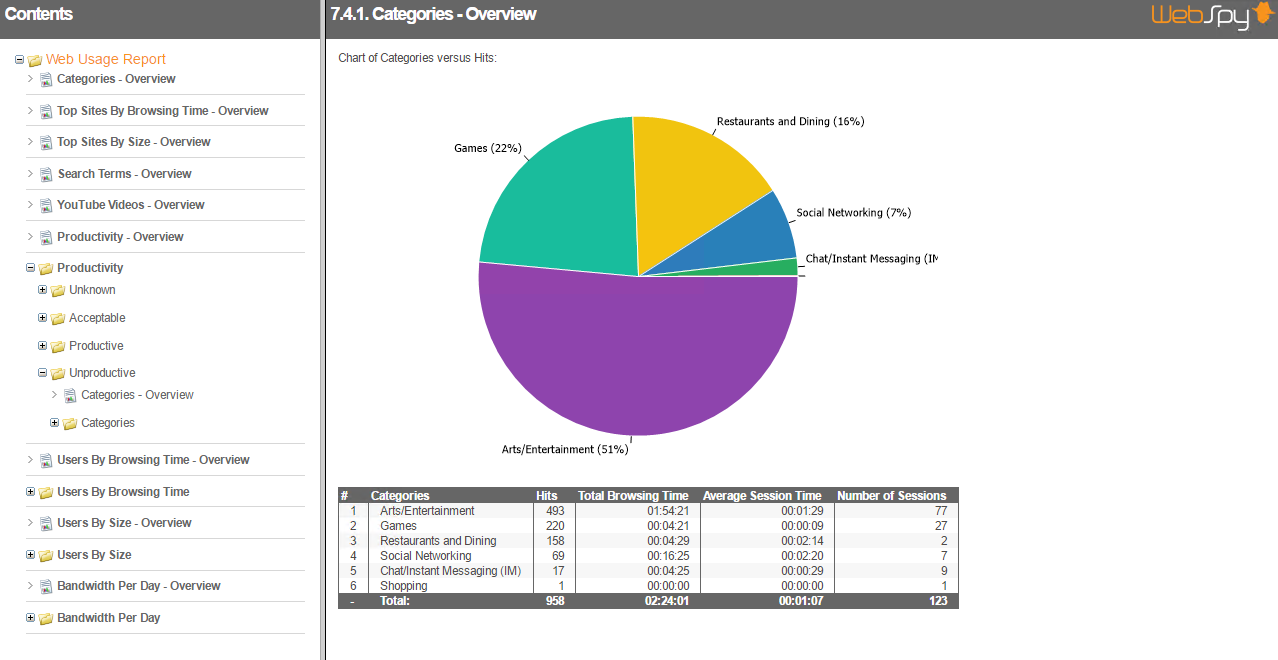
A report in static HTML document format.
Generating Reports
Exploring your data on the Analysis tab is a great way to become familiar with the information that WebSpy Vantage can extract from your log files. However, it is unlikely you will give this interface to your HR manager or a school principal to report on web usage themselves. Instead, you will want to extract just the information they need, presented in a report.
WebSpy Vantage provides full control over the content of your reports using Report Templates. Vantage comes with a range of default Report Templates for common reporting requirements. The default Report Templates are a good way to get started and see how reports can be generated as documents, and/or published to the Web Module. However, it is likely that you will want to create your own templates, or at least customize some of the default Report Templates to suit your individual requirements.
Go to the Reports tab to view the Report Templates you are able to run.
Note: You will only see report templates that can be generated on the schemas contained in your Storage. If you have not imported any data, you will not see any Report Templates here. To see all Report Templates regardless of whether you have imported data, click the Show All Templates option.
There are two ways to produce reports in WebSpy Vantage. Generating reports as documents (HTML, PDF, Word, CSV and Text) or publishing reports to the Web Module for secure access.
- Select a Report Template and click the Generate Report option to launch the Generate Report Wizard.
- On the Storages page, select the Storage you want to report on.
- On the Format page, select the type of document you want to create the report as (HTML, Word, PDF, CVS, Text).
- On the Publish page, you can customize the name of the report, prefix the name with today’s date, copy the report to a location and compress it using zip (useful when emailing the ‘HTML, Loose Files’ Report Format to someone as an attachment).
- On the Documents page, you can choose to split your report into multiple documents based on anything in your log files, and/or aliases you have created such as Categories, Departments, Subnets, and so on. Leave this option unchecked to create a single report document.
- On the Filters page, click Add | Date Filter and select the dates you want to report on. You can also include/exclude any values from your log files using Add | Field Value Filter.
- The Email page enables you to email the report to someone as an attachment (Set your SMTP options in Tools | Options | Email).
- Once the report has been generated, it will appear in the Report Manager at the bottom of the screen. Double-click the file to open and view the report.
- Select a Report Template and click the Publish Report option to launch the Publish Report to Web Module wizard.
- On the Storages page, select the Storage you want to report on.
- On the Template page, select the Report Template that you want to generate (the template selected in step 1 will be automatically selected)
- On the Publish page, select the Web Module you want to publish the report to. If you would like the option to drill down past the bounds of the report when viewing the report in the Web Module, check the Publish the selected storages to enable the ‘further analysis’ feature option.
- On the Split and Permit page, select No Separation to create just a single report, and select Everyone as the permission. Splitting reports by groups or managers and giving permission to certain people requires first importing your Organization information from LDAP on the Organization tab. See below.
- On the Filters page, click Add | Date Filter and select the dates you want to report on.
- The Notification page can be used to send a notification email to everyone with permission to the report(s). For now, leave the option unchecked.
- Click OK to publish the report to the Web Module.
- Once the report has been published, log into the Web Module and go to the Reports tab. Click the report to open and view it.
You can automate the generation or publishing of Reports using the Tasks tab (see the section on automating the reporting process below)
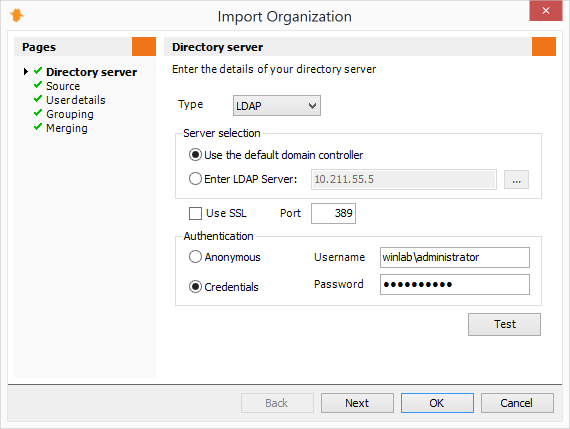
Entering Directory Server details
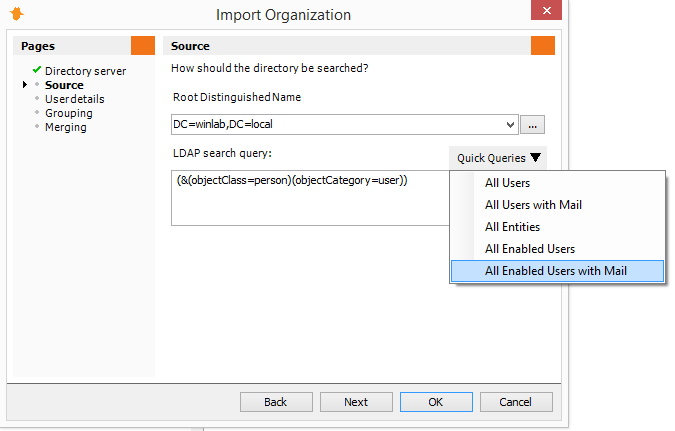
Selecting LDAP Root DN and Search Query.
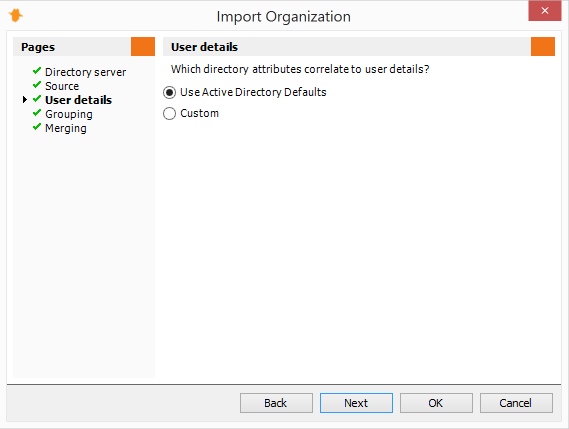
Using LDAP attributes for username aliasing and Web Module login names.
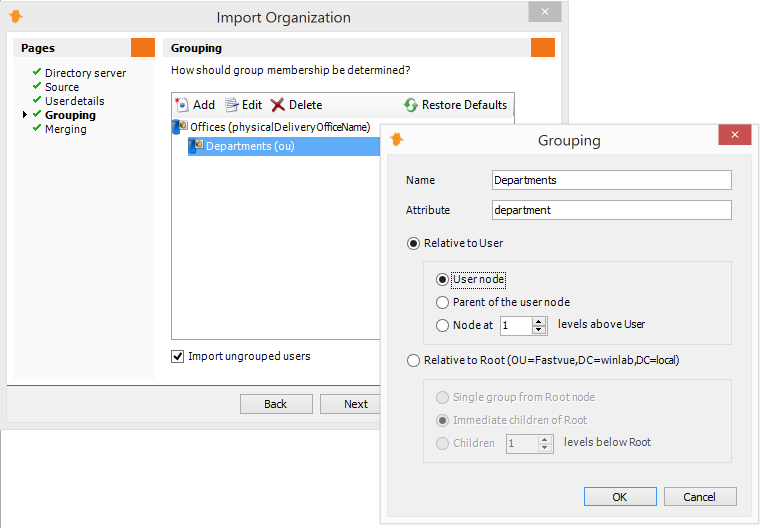
Grouping users by LDAP attributes and/or OUs.
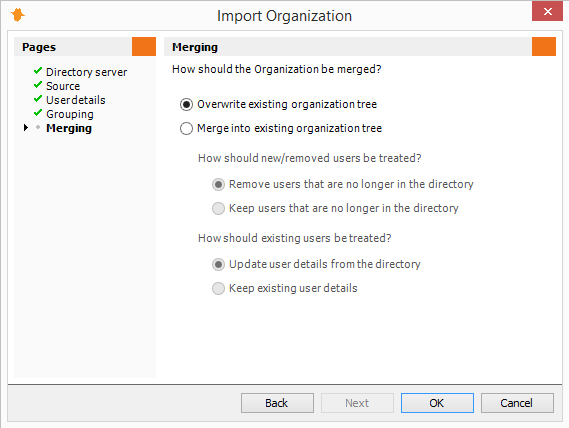
LDAP import merging options.
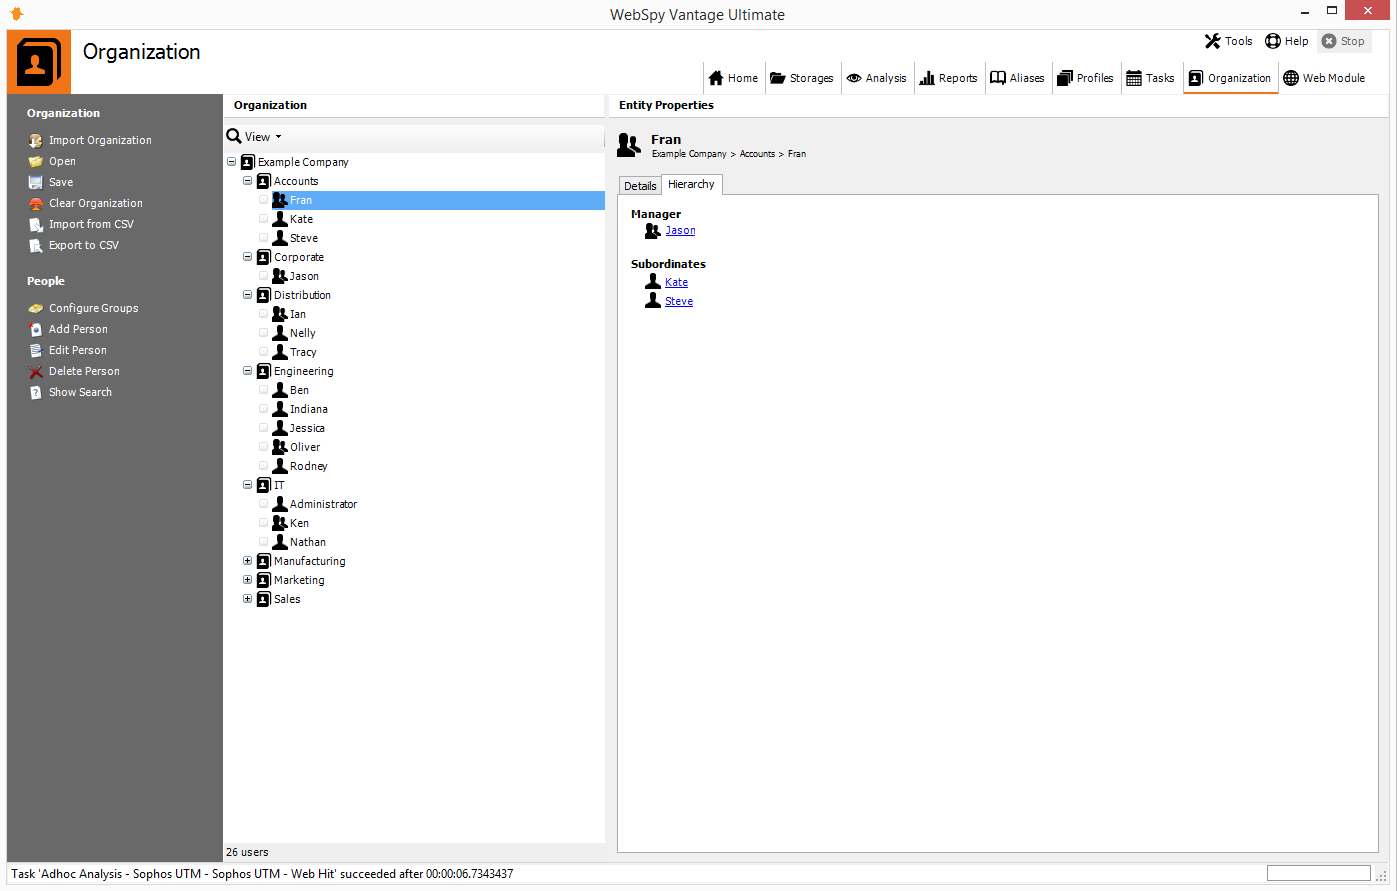
A successfully imported Organization tree.
Import Your Organization
You may want to add content to your reports to show your top departments or offices, or perhaps get rid of the ugly username format and show a nicer ‘FirstName LastName’ format in your reports. You may also like to split your reports by Department and distribute them to your Department managers using their secure login to the Web Module.
You can do this by importing your Organization data from LDAP, which maps authenticated usernames in your log files to their Active Directory object. This process populates the Usernames Aliases that transform your authenticated usernames into real users, and creates Aliases for the groups you define such as Departments, Offices or Locations.
Go to the Organization tab and click Import Organization. The Wizard will guide you through the process of making the following selections:
On the Directory Server page, select your directory type and server, along with a username (in domain\username format) and password to authenticate with your directory server, and click Test. Click Next after you have successfully connected to your directory server.
- Select a Root Distinguished Name to search for users within (for example, ‘dc=mydomain, dc=com’) from the dropdown list. If your users are contained within a specific OU, select the ‘…‘ button to select the OU in your directory.
- The LDAP search query is defaulted to a query that returns ‘user accounts’. It’s important to note that WebSpy Vantage’s licensing is based on ‘number of users’, so if necessary, use the Quick Queries dropdown to change the LDAP search query and import a more specific set of user accounts, such as enabled users with an email address. WebSpy Vantage will import all users up to the license limit, which is unlimited during your trial. Click Next.
The User Details page defines how Vantage maps user objects in your Directory to authenticated usernames in your log files, as well as configuring user login names for the Web Module, the email address to send report notifications to, and the attribute to use to find a user’s manager.
If you are using Active Directory, you can choose Use Active Directory Defaults. This will import the most common username formats both with and without domain prefixes accounting for 99% of log analysis situations that we see.
If you are using a different directory server, or your log file log usernames in a custom way (such as a custom UID), then select Custom and there are two important concepts you may need to change:
- Login Name:
Usually, you will configure the Web Module to use Windows Authentication. For your users to be able to login using this authentication method, specify a prefix in the login section for yourdomain\ (replace with your actual domain and include the slash). IIS will then authenticate your users against your domain correctly, and they will be able to login to the web module without an authentication prompt as long as they’re logged into Windows, assuming they’re permitted login to the Web Module (see the Configure Web Module Permissions section below). - Know your log file’s username format:
The configuration of the User Details page defines what is imported into the Usernames Alias (seen on the Aliases tab), which is what maps the authenticated usernames in your log files to user objects in your domain.You can utilize the Usernames Alias in the content of your reports (via nodes in Report Templates), and when specifying Filters when generating reports (via Add | Field Value Filter | Summary = User, Alias = Usernames).Log files record authenticated usernames in a variety of ways. Some simply log the login name (called sAMAccountName in Active Directory), some include the domain prefix (Domain\sAMAccountName), some include an authentication realm suffix (Domain\sAMAccountName@Realm) and so on.It is important to know how your device is logging usernames, so that you can prefix and/or suffix the appropriate values around the sAMAccountName, or import a different attribute from your directory such as userPrinicpalName, a UserID or the user’s full DN.To find out how your device logs usernames, go to the Analysis tab and run an ad-hoc analysis and your storage (add a Date Filter on the Filters page to keep the analysis small), and then go to the Usernames summary in the analysis. Note the username format, and use the appropriate options in the User Details page of the Import Organization wizard.If your device logs in the Domain\Username format, use the ‘prefix’ option in the Login name section to prefix yourdomain\.If your device logs usernames differently, click the Add button in the Additional Attributes section, and enter the attribute you would like to import from your domain (such as sAMAccountName or UID), and use the prefix/suffix options to surround the imported value with the appropriate text.
Once you have configured the User Details page to create an appropriate login name, as well as map user objects to your log data, click Next.
The Grouping page enables you to configure how you would like users grouped, such as by Departments, Offices, OUs etc. User Objects in Active Directory have a number of attributes, including department, office, description, company, and you can also place user objects in OU containers, and configure attributes on those containers. WebSpy Vantage can hook into any of these attributes to group your users for the purpose of reporting.
By default, there are two groups specified: Offices (using the ‘physicalDeliveryOfficeName’ attribute in Active Directory) and Departments (using the ‘department’ attribute in Active Directory). It is important to note, that if a user does not have one of these values populated in Active Directory, then they will not be imported. You can edit or delete these groups as necessary.
When adding or editing a group:
- First, enter the name of the Group into the Name field. This is up to you and should represent what the group is, such as ‘Departments’, ‘Locations’, ‘Business Centers’ etc. (Note, there are a few default Report Templates that use ‘Departments’ so use the word ‘Departments’ in one of your grouping levels utilize these reports).
- Enter the exact name of the attribute into the Attribute field. For example, enter ‘physicalDeliveryOfficeName’ to import the Office attribute from Active Directory. To import the name of an OU, use the attribute ‘OU’. (Note that by default, Active Directory Users and Computers hides the real attribute names. You can change this by selecting View | Advanced Features to show the Attribute Editor with real attribute names when editing a User or OU).
There are two ways to specify the object in your directory that contains the attribute to use for grouping:
- Relative to user:
Use this option if the attribute is located on the user object itself or on one of its parent OU containers. For example, if you are using the ‘Department’ attribute on the user objects, then select Relative to user and select User node. Or if your users are in a consistent OU structure, specify either Parent of the user node, or Node ‘n’ levels above to access the attribute on the appropriate parent OU container. - Relative to root:
Use this option to select OUs relative to the Root Distinguished Name that you specified on the Directory Server page. For example, if you have defined OUs for all your Offices directly underneath your Root DN, with user objects located anywhere underneath those OUs, then use the Immediate children of Root option, or the Children ‘n’ levels below Root option. For inconsistent OU structures, you can use the Single group from Root node option, and use the Import Organization wizard multiple times (usually specified as part of a Task – see below) with the Merge options set, to create groups from multiple Root DNs in your directory.Tip: Later, you’ll need to configure Web Module access permissions for people and/or groups. To create a default set of permissions that apply to your entire organization, create a top-level group using an attribute that everyone is a member of. For example, call the group ‘Domain’ and use the attribute ‘dc’.
Once you have specified all the Groups you would like to use in your Reporting process, click Next.
The Merging page enables you to use the Import Organization wizard multiple times, and merge the results into your existing Organization structure. For example, first import your Organization from one domain (or one Root DN on your domain), with the Overwrite existing organization tree option set to create an initial Organization tree, then run the Import Organization wizard again to import your Organization from another domain (or a different Root DN on your domain) and merge the results into your existing Organization tree.
The Merge options enable to you to keep or remove users that can no longer be found in the directory, as well as keep or update existing user’s details. Use the ‘keep users / keep details’ options if importing from a different domain or root DN.
Note: When merging, only users that have previously been added from your LDAP/LDIF directory will be affected. Users that have been manually added will not be affected.
Click OK to complete the Import Organization wizard and begin the import. Once the import is complete you will see you the Organization tree displayed. You can use the View drop-down list at the top of the Organization tree to display your groups, or your manager/subordinate hierarchy.
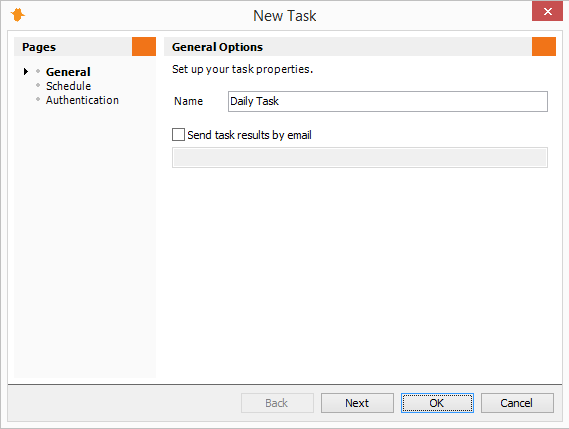
Giving the Task a name to represent its schedule.
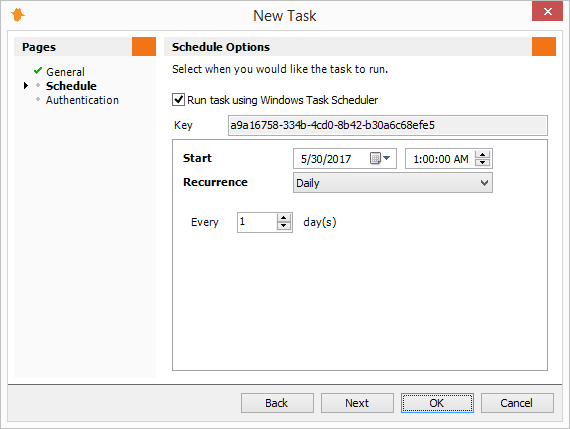
Setting the Task’s schedule
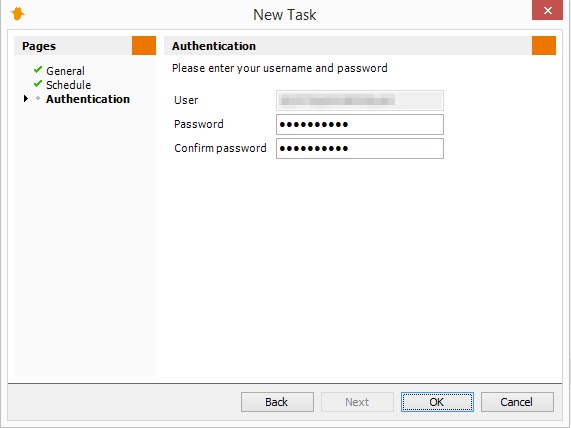
Providing authentication credentials for the Task
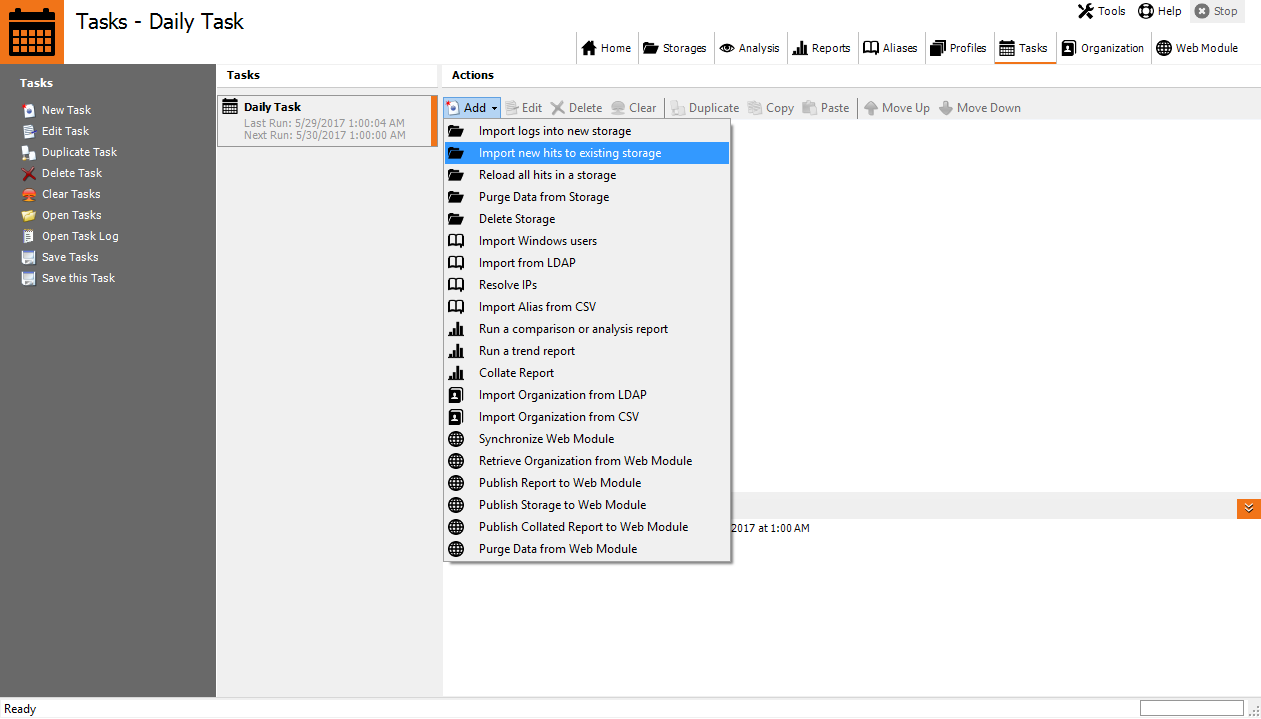
Adding Actions to the Task
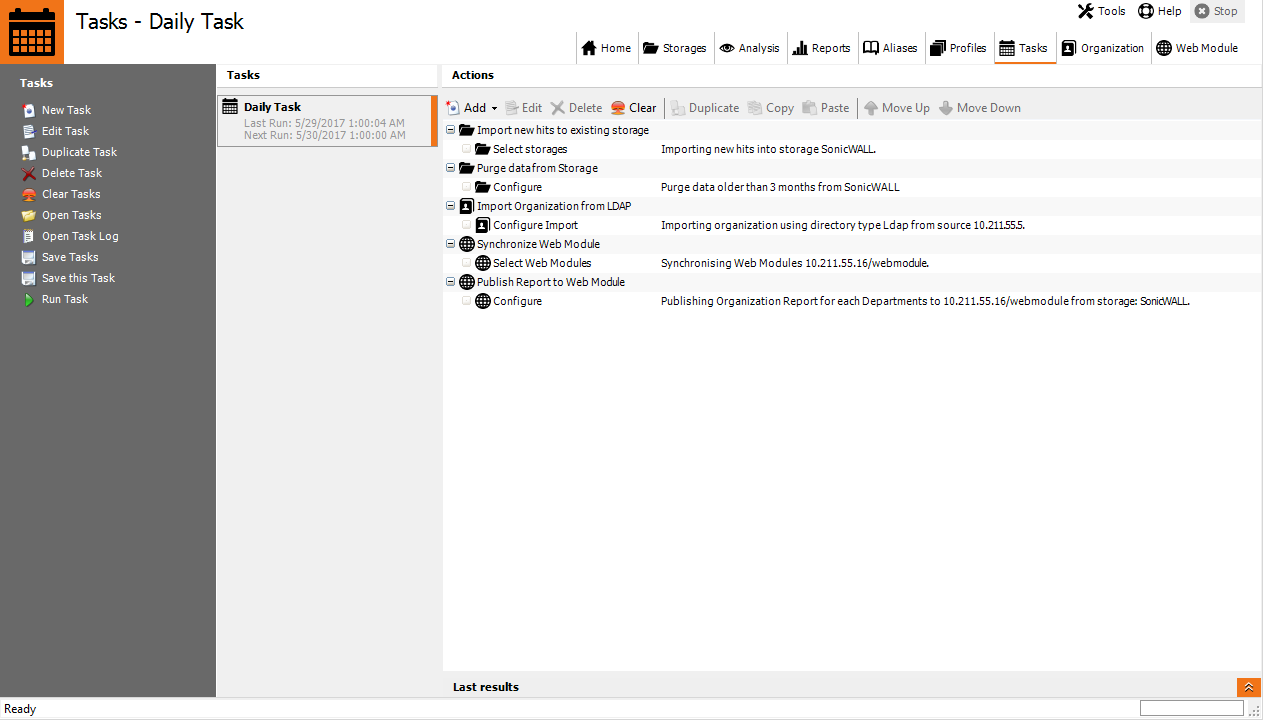
A Task with configured Actions.
Automating the Reporting Process
All the steps above can be automated, enabling you to get back to real work, rather than running reports each day, week or month. Automating the reporting process is done on the Tasks tab in WebSpy Vantage.
There are two steps to automating the reporting process:
- Add a Task
A Task specifies the schedule. When you add a task, WebSpy Vantage will create a Windows Schedule Task in the background that launches the WebSpy Vantage executable on the specified schedule. To add a Task, go to the Tasks tab and click New Task. Run through the Task Wizard to specify the name, schedule and authentication details for the Task. - Add Actions to the Task
Now that Windows Task Scheduler will launch the Vantage executable on a schedule, you now need to tell Vantage what to do. This is done by adding Actions to the task such as importing logs into an existing storage, purging old data from your storage, importing your Organization from LDAP, and publishing reports to the Web Module. To add an Action, select your Task and click Add. Then select one of the Actions you would like Vantage to perform. Repeat this for all the Actions you would like Vantage to perform on your Task’s schedule.
To get started, create a Daily Task that imports your logs each day, purges old data from the storage, gets the latest Organization information from Active Directory, and Publishes Reports to the Web Module:
- Go to the Tasks tab and click New Task
- Name the task Daily Task and click Next
- On the Schedule page, set the task to run tomorrow at 1am in the morning with a Daily recurrence, every 1 day. Click Next.
- On the Authentication page, enter the password of the user account you currently using. When you are logged off the machine, the Windows Schedule Task will launch Vantage under these credentials.
- Select your Daily Task, and click the Add button. This presents a list of all the actions that can be automated.
- Import new logs
For the first action, select Import new hits to existing storage, and then select your storage. Select Resume import from last position, to import new log files added to the folder your storage is monitoring, along with any new data added to existing log files. Select Return to start of log file or table if the log files you’re importing get overwritten with new data (For example, a single log file that gets re-created each day with new data). Click OK to add the Action. - Set a data retention policy
For the second action, select Purge data from storage. Select your Storage and click Next. Select Data older than 3 months (or your desired data retention policy) and click OK. - Retrieve new Organization information your Directory
For the third action, select Import Organization from LDAP. Proceed through the Import Organization wizard (see steps above) to configure the way users and groups should be imported from your directory server. As this action alters your Organization and Alias information, you need to push the new configuration to the Web Module using the Synchronize Web Module task action. Click Add | Synchronize Web Module and select your Web Module. - Publish Reports
For the fourth action, select Publish Report to Web Module and proceed through the wizard to publish reports for specific groups, managers or people. As this report will be published on a daily schedule, ensure it is only reporting on yesterday’s data using a Relative Date Filter. On the Filters page, click Add | Relative Date Filter and select Past 1 day.

Selecting Users and Groups that need to access the Web Module
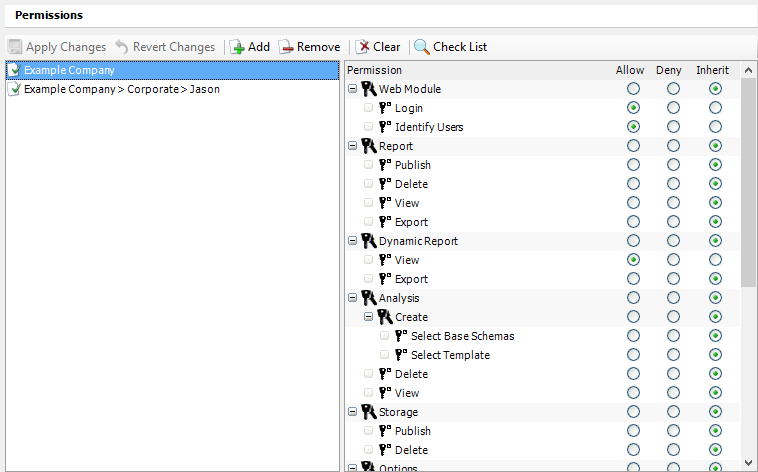
Selecting base access permissions for groups
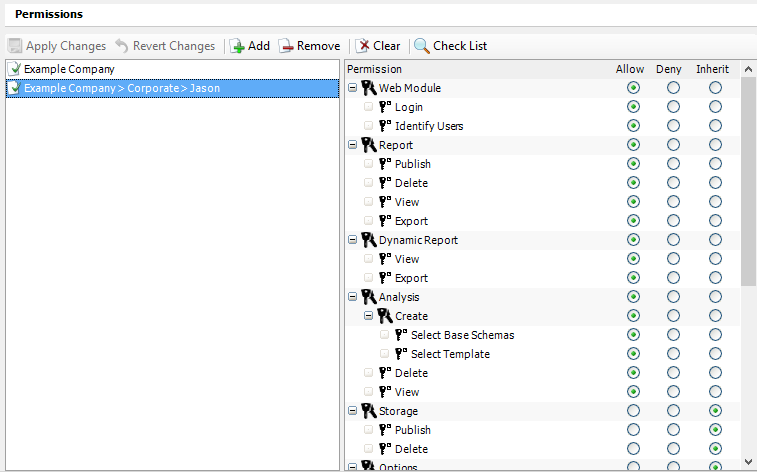
Selecting access permissions for specific individuals.
Configure Web Module Permissions
Using the Publish Report to Web Module action, you can configure who can access each report. However, for them to do this, they first need access to log into the web module. By default, the web module will deny access to anyone that is not a Web Module Administrator.
Configuring access permissions to the Web Module is done on the Web Module tab in Vantage.
To configure access permissions:
- Go to the Web Module tab. Select your Web Module and click Connect.
- In the Permission section, click the Add button and select either groups or people that you would like to give access to the Web Module. Click OK.
- Select one of the users or groups you just added to the permissions list, and select the Allow radio button for the parts of the Web Module you would like them to access. For people that just need to view reports, we recommend the Login, Identify User and Dynamic Reports | View permissions. Repeat for all the users and groups you added.
A report viewed on the Dynamic Reports tab.
Enjoy!
Now that you have configured and automated your reporting process, all that’s left to do is read your reports.
If you have followed the process above to publish daily reports to the Web Module, then simply log into the Web Module and go to either the Reports tab to view each daily report, or go to the Dynamic Reports tab to select a date range and have the information from your daily reports collated into one report.
If you get stuck along the way, don’t hesitate to contact Fastvue/WebSpy Support and we’ll happily help you out!